###登录
开机后,扫一下局域网ip,一共256个,几秒钟就扫出来了,机器名是raspberrypi
有很多现成的扫描软件,Win上ipscan,iOS上iNet等都可
ssh登录上去
默认用户名是pi,密码是raspberry
###更换源,最重要的事!
不解释1
sudo nano /etc/apt/sources.list
编辑sources文件,将里面的内容替换成1
2deb http://mirror.nus.edu.sg/raspbian/raspbian/ wheezy main contrib non-free rpi
deb-src http://mirror.nus.edu.sg/raspbian/raspbian/ wheezy main contrib non-free rpi
按ctrl+o保存,按ctrl+x退出,接着输入更新1
2sudo apt-get update
sudo apt-get upgrade
###时间修改
刚装上时间是UTC(Coordinated Universal Time)标准时间,而不是中国的CST(China Shanghai Time,东八区时间)
修改也很简单,输入三行命令就可以了1
2
3sudo ln /usr/share/zoneinfo/Asia/Shanghai /etc/localtime
sudo rm /etc/localtime
sudo ln -sf /usr/share/zoneinfo/Asia/Shanghai /etc/localtime
###VNC图形界面登录
下载vnc的服务器端1
sudo apt-get install tightvncserver
安装过程中会提示是否安装,按小写的y后回车,继续安装。安装完成后会让你设置一个VNC登陆的密码,输入密码后还会问你是否输入个只能观看不能操作的密码,一般选择n,也就是不设置。整个安装完成之后输入1
vncserver -geometry 1024x680
后面那个参数就是你想显示的分辨率。命令成功执行后,ssh里会显示
这里说明一点,每执行一次上面的命令,就打开了一个VNC的端口。VNC默认的端口是5901,也就是说,上面命令执行完成后的编号表示你当前可以连接的端口号。这时候VNC的服务端已经安装完成了,你需要一个客户端来连接这个服务端。这里可以使用tightvnc view或者别的
IP是你的树莓派的IP,端口号就是上面ssh中New ‘X’ desktop is raspberrypi:1加上5900,因此现在可以连接的端口号是5901。当然你可以再次执行vncserver -geometry 1024x680,那么New ‘X’ desktop is raspberrypi:2,可以连接的端口号就是5901和5902,以此类推。点击连接按钮,需要输入前面设置过的VNC登陆密码
###安装中文字库1
sudo apt-get install ttf-wqy-zenhei
安装中文输入法1
sudo apt-get install scim-pinyin
安装完毕后输入1
sudo raspi-config
然后选择change_locale,在Default locale for the system environment:中选择zh_CN.UTF-8,配置完成之后重启
重启完成好就可以在VNC连接上去后使用中文显示和中文输入法了,切换中文输入法一样也是ctrl+space
###安装谷歌浏览器Chromium1
sudo apt-get install chromium-browser chromium-l10n
###连接无线,摆脱网线
先确定你的无线网卡已经被识别
然后VNC上去右上角有连接无线的配置,直接点进去连你的Wifi
建议使用360Wifi这种随时可以改账号密码的,换个地方也不用重新配置,比较方便
然后拔掉网线,重启下,噢耶,360Wifi控制界面会显示有新设备连接上来
###获取CPU温度,RAM,内存
从网上抄了个
新建Python文件info.py
写入1
2
3
4
5
6
7
8
9
10
11
12
13
14
15
16
17
18
19
20
21
22
23
24
25
26
27
28
29
30
31
32
33
34
35
36
37
38
39
40
41
42
43
44
45
46
47
48
49
50
51
52
53
54
55
56
57
58
59
60
61
62
63
64
65
66
67import os
# Return CPU temperature as a character string
def getCPUtemperature():
res = os.popen('vcgencmd measure_temp').readline()
return(res.replace("temp=","").replace("'C\n",""))
# Return RAM information (unit=kb) in a list
# Index 0: total RAM
# Index 1: used RAM
# Index 2: free RAM
def getRAMinfo():
p = os.popen('free')
i = 0
while 1:
i = i + 1
line = p.readline()
if i==2:
return(line.split()[1:4])
# Return % of CPU used by user as a character string
def getCPUuse():
return(str(os.popen("top -n1 | awk '/Cpu\(s\):/ {print $2}'").readline().strip()))
# Return information about disk space as a list (unit included)
# Index 0: total disk space
# Index 1: used disk space
# Index 2: remaining disk space
# Index 3: percentage of disk used
def getDiskSpace():
p = os.popen("df -h /")
i = 0
while 1:
i = i +1
line = p.readline()
if i==2:
return(line.split()[1:5])
# CPU informatiom
CPU_temp = getCPUtemperature()
CPU_usage = getCPUuse()
# RAM information
# Output is in kb, here I convert it in Mb for readability
RAM_stats = getRAMinfo()
RAM_total = round(int(RAM_stats[0]) / 1000,1)
RAM_used = round(int(RAM_stats[1]) / 1000,1)
RAM_free = round(int(RAM_stats[2]) / 1000,1)
# Disk information
DISK_stats = getDiskSpace()
DISK_total = DISK_stats[0]
DISK_used = DISK_stats[1]
DISK_perc = DISK_stats[3]
if __name__ == '__main__':
print('')
print('CPU Temperature = '+CPU_temp)
print('CPU Use = '+CPU_usage)
print('')
print('RAM Total = '+str(RAM_total)+' MB')
print('RAM Used = '+str(RAM_used)+' MB')
print('RAM Free = '+str(RAM_free)+' MB')
print('')
print('DISK Total Space = '+str(DISK_total)+'B')
print('DISK Used Space = '+str(DISK_used)+'B')
print('DISK Used Percentage = '+str(DISK_perc))
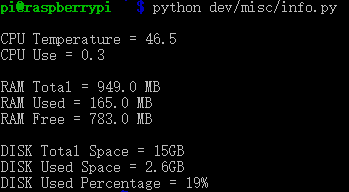
运行1
python info.py
结果